
Filters you can trust. Pure water every day.
In cart {{totalProductsCount}} item(s)
Your cart is empty
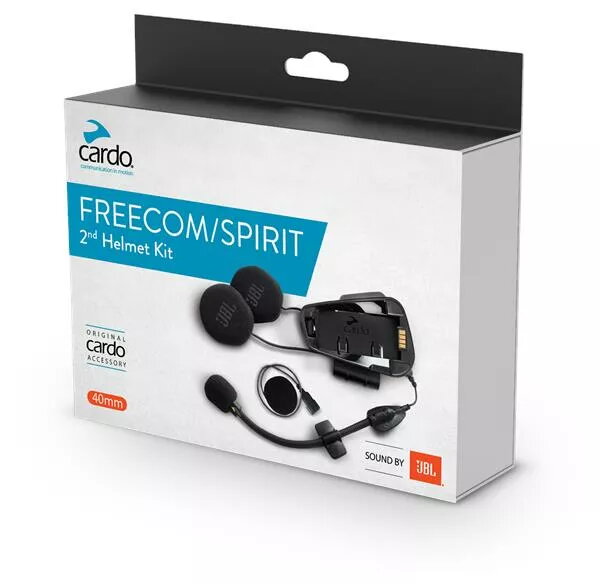
Helmet Kit Cardo Freecom / Spirit 2nd, Sound by JBL — accessory kit for single-channel communicator
Helmet kit for Cardo Freecom and Spirit 2nd communication systems with Sound by JBL speakers. This accessory kit includes speakers, mounting cradle and both boom and wired microphones designed to be installed into compatible motorcycle helmets. The set enables hands-free voice communication, high-fidelity music playback and clear navigation prompts when connected to a single-channel Cardo communicator, and is suitable for replacing worn helmet audio parts or retrofitting a helmet for use with Cardo Freecom / Spirit 2nd devices.
The kit includes 40 mm Sound by JBL speakers tuned for improved sound clarity and balanced audio, a dedicated FREECOM/SPIRIT cradle with clamp for secure attachment, and both boom and wired microphone options to suit full-face or modular helmets. Speaker booster pads and adhesive accessories are provided to ensure stable positioning and acoustic isolation. The installation guide and activation instructions for JBL components simplify setup and integration with Cardo single-unit communicators.
Position the 40 mm speakers inside the helmet over the ear pockets and fix them with the supplied round or rectangular hook-and-loop pads and speaker booster pads to achieve correct alignment. Attach the cradle with clamp to the helmet shell following the installation guide and use the glue plate if required for additional fixation. Choose the boom microphone for open-face or modular helmets where an external mic is preferred, or use the wired in-helmet microphone for full-face helmets. Route cables along the helmet interior, secure with the provided adhesive pads, and connect to the Cardo single-channel communicator. Follow the JBL activation guide to enable any speaker-specific features and test audio and microphone levels before riding.
For best audio performance, place speakers directly over the ear canal area, use the booster pads to reduce vibration, and ensure the microphone is positioned close to the mouth but clear of wind paths. Verify all adhesive surfaces are clean and dry before applying, and follow the installation guide for secure mounting. After installation, perform a sound and call check in a quiet area and adjust communicator volume settings as needed.
{{highlightedFeature.featureTitle}}:
{{getProductFeatureValueById(product, highlightedFeature.featureId)}}
{{ productComparisonGenerationError }}